0011A Foldable Dymaxion Globe
2017-01-10
A recent post on Hackaday inspired me to build my own wooden Dymaxion globe. But instead of fixing the parts together, I decided to make it foldable.
The Dymaxion map
In the 1940ies, architect and inventor Buckminster Fuller invented the Dymaxion map: A world map created by mapping the globe onto an icosahedron and then unfolding its 20 faces:

Image by Chris Rywalt - POVRay, CC BY-SA 3.0, Link
Compared with other prominent map projections like the Mercator projection, the Dymaxion map shows far less distortion especially around the polar regions. Also the icosahedron can be unfolded in different ways, leading to maps emphasising varying aspects of the globe.
Inspiration and Prototype
Recently, Hackaday featured a blog post by Gavin Smith where he describes building a laser-cut version of the Dymaxion globe, with wooden faces fixed together using 3D printed vertices:
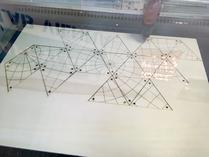
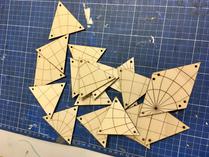
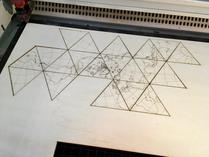
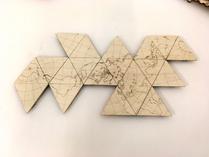
I really liked this project, so I decided to make my own. I used the laser-cutter at Happylab to cut a first prototype. Because I was in a hurry I had to leave out engraving the continents, also there are two oversized pieces where I accidentally deleted the cut line while preparing the file for the laser-cutter:
Playing around with the cut parts I started to wonder: Would it be possible to make the globe foldable? After all this would you give you one single object that is both the globe and the map at the same time – a perfect representation of the idea behind the Dymaxion map.
How to Build Hinges?
To make the globe foldable I would need hinges. The hinges should not only provide a sturdy connection between two neighbouring faces, but they should also restrict the angle between the faces to a range between 138° and 180°1.
I briefly thought about modelling such hinges from scratch for 3d printing, but that would have taken quite some time and I wanted to finish the globe before xmas. So I kept looking for a simpler solution.
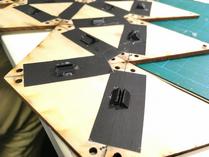
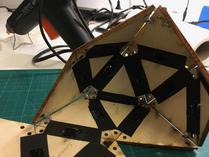
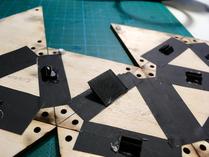
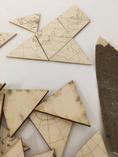
Why not just use gaffer tape2? To restrict the angle between adjacent faces I could quickly 3d print a few small prisms to be used as stoppers. Add tiny neodymium magnets3 to keep folded faces in place, and voilà – this should work! I decided to give it a try:
First Lessons Learnt
- Gaffer tape works great as a hinge: It sticks to the wood reliably and also provides surprisingly good stabilisation, preventing the faces from being twisted against each other. The stabilisation could possibly be even better if I’d place the tape over the corners (connecting up to 6 faces at once) instead of along the edges.
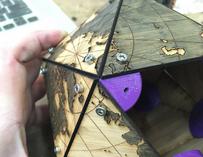
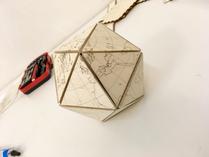
- Magnets work fine for keeping folded faces in place, but I’d have to consider the magnets’ height to determine their correct placement: Placing them too near to the edge leads to a gap between the folded faces (see the picture of partially folded prototype), and placing them too far on the inside prevents the magnets from touching each other, resulting in a weak hold.
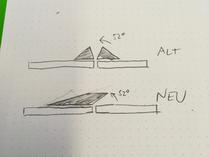
- The stoppers are too small, gluing them onto the faces is a real pain in the ass. Also, there is no need to have stoppers at each side of an edge: If I use a different design (see below), only a single stopper per edge is needed.
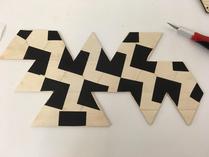
So I decided to rework the design of the stoppers. And I designed an additional part to solve the “magnet placement” problem: It looks similar to the first stopper design and is used to keep the magnets at the correct angle and position to ensure they touch flatly when the globe is folded up, resulting in a firm connection and no gap between the faces.
The newly designed magnet holders turned out to work very well (note the satisfying “clunk” when the magnets connect):
Not only do these magnet holders look similar to the initial stopper design, they also work like stoppers. So I decided to ditch use the “real” stoppers only on the inner edges.
A minor but important detail: I designed stoppers and magnet holders to have the exact same height so the unfolded globe (map side up), which rests on both the stoppers and magnet holders, lies evenly.
Making the Final Globe
Now being confident that everything would work out as expected I started making the final version of the globe:
- I went to the Happylab again to laser-cut the faces, this time also engraving the continents4. I also got rid of the unneeded screw holes.
- I sanded all of the pieces (especially the sides) to remove any dark residue left by the laser-cutter, then connected them using gaffer tape as hinges.
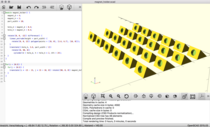
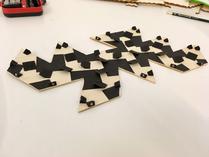
- In 3d printer I printed 19 stoppers and 22 magnet holders5 and fixed them to the pieces using hot glue. For fixing the magnets inside the magnet holders hot glue turned out to be too viscous, so I used some plastic glue there instead.
And that’s it! I’m very happy with the final result, it folds up almost automagically and the folded globe is nice and sturdy. You can even (carefully) throw it around!
Unfolding the globe is a bit tricky: You have to find one of the corners where there is no hinge and then peel it apart one face at a time, breaking up the strong magnetic connections. But with a bit of practice this can be done easily, too.
Files
Here are all the files you need if you want to make your own foldable Dymaxion globe:
- dymaxion_globe.svg (SVG, 800 KB, based on Fuller_projection_rotated.svg by Eric Gaba CC BY-SA 2.5)
- magnet_holders.scad (OpenSCAD, 1 KB)
- magnet_holders.stl (STL, 500 KB)
- stoppers.scad (OpenSCAD, 1 KB)
- stoppers.stl (STL, 15 KB)
-
138° is the (approximate) dihedral angle of a regular icosahedron, and 180° is needed to allow the unfolded faces to lay flat. ↩
-
Also known as duct tape. But they are different, and I was actually using gaffer tape in this project. Now stop worrying and continue reading. ↩
-
I used 4x2mm cylindrical neodymium magnets. ↩
-
I only engraved the contours because this can be done much faster (using the laser cutter in “vector mode” instead of “pixel mode”). I also very much like the clean look of the resulting map. ↩
-
An icosahedron has 30 edges. When unfolded, 19 “inner” edges stay connected while the remaining 11 edges are split up into two edges each, resulting in 11⨉2=22 outer edges. There’s a magnet holder on each outer edge and a stopper on each inner edge, so in total 22 magnet holders and 19 stoppers are needed. ↩
Leave a comment