0028LED train – a prototype
2022-07-03
LEDs are cool. Model trains are cool. How cool would it be to have LEDs on a model train?
As so often, it started with a spontaneous idea: “What if I mount a small LED matrix on a model train, to display scrolling text in a way that is synchronised with the train’s speed?”
Well, let’s try it out! And for additional fun let’s also see if I manage to complete a first prototype in a single evening.
There was no spare LED matrix lying around, so I decided to use a short segment of an addressable LED strip instead: After all, if I can make it work with a single row of “pixels”, extending the prototype to a multi-row display would be straightforward.
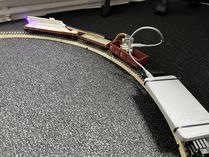
To mount the LED strip on the train I cobbled together some pieces of foam-board to build a mount that fits into one of the freight wagons1. As usual, the LEDs would be controlled by a Pixelblaze module. And to provide power for both the Pixelblaze and the LED strip, I mounted a USB power-bank2 onto another freight wagon3.
Detecting the train’s speed
Let’s recap the original idea: A LED matrix showing text synchronised with the position of the train. In other words, the text should appear “anchored” to the track: When the train is at a specific position, it should always display the same part of the text.
To make this work it is obviously necessary to know the current position of the train. Or at least it’s speed, so that the position can be (more or less accurately) inferred .
Surely for this matter a wheel speed sensor could be used, but … that would be an obvious choice and therefore boring. I sure prefer something more convoluted!
Now, the tracks of this particular kind of model train (“Märklin M-Gleis”) include an embankment made from metal. The colour contrast between the embankment and the black sleepers is quite large, so … why not use a light sensor to detect sleepers?
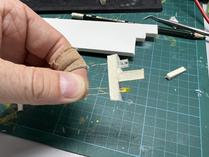
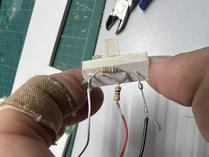
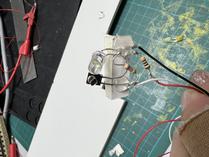
Again using foam-board and hot glue I very quickly put together a dead bug prototype and … it didn’t work at all.
The LED was way too dark, and the light sensor turned out to react to light coming from almost any direction instead of detecting the light reflected from the track only.
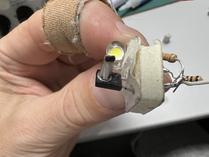
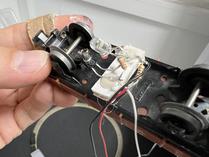
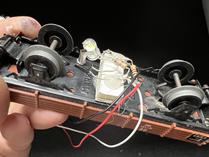
Switching to a brighter LED was trivial, but what about the light sensor? It obviously needed to be focussed on a tight spot of the track. Time for another crazy idea like … glueing an electric end terminal to the sensor? Well, why not! I also covered the rest of the sensor in black paint to shield it from light coming from other directions. This manifestation of utter beauty was then mounted to the underside of another wagon.
To much surprise this setup worked like a charm. As seen on the oscilloscope, the light sensor produces a very clear, distinctive signal for each sleeper it moves over:
Putting everything together
Now it was finally time to put everything together. I connected the sensor module to one of the Pixelblaze’s analog inputs, and programmed a pattern that would “move” the lights in step with the information from sensor, adapting to the speed of the train:
So far so good! And I did indeed complete this prototype in a single (albeit long) evening session.
Next steps
In the next sessions I’m planning to replace the ugly foam-board based sensor module with a proper 3d printed casing, and changing the LED strip to full LED matrix so that it becomes possible to display text.
Besides it would be nice if the sensor would also detect the direction of movement (right now it only detects the speed, so the LED patterns “moves” in the same direction regardless of the direction of the train).
-
As is tradition with projects involving original older components (here: a model train from the eighties) I tried to avoid any permanent modifications to these components. ↩
-
Why not use the power from the electrical train tracks? Well, it’s an old model train where the engine’s speed is controlled by altering the current supplied to the tracks; besides it’s using AC. So a non-trivial power supply module would be needed, containing at least a rectifier and a battery. Doable of course, but out of scope for a prototype. ↩
-
Incidentally I mounted the power bank onto a schnabel wagon – large transformers are indeed a typical load for these wagons. ↩
Leave a comment